> ## Documentation Index
> Fetch the complete documentation index at: https://bruno-a6972042-tutor-mock-server.mintlify.site/llms.txt
> Use this file to discover all available pages before exploring further.
# Mock Servers from OpenAPI
> Walk through loading an OpenAPI spec in Bruno, generating mock responses from operations, syncing when the spec changes, and running the mock locally.
An OpenAPI document already describes paths, methods, status codes, and response schemas. Bruno can turn that contract into a local mock so frontend and integration work can start before the real service exists or continue when the backend is unavailable.
This guide loads a spec into Bruno, creates a spec-linked mock, generates responses from operations, and starts the server.
Mock Servers are in **Beta**. Open **Preferences → Beta** to turn on the **Mock Server** feature. The **Mock Servers** section appears in the sidebar only after you opt in.
## 1. Open an OpenAPI spec
Bruno can view and work with existing OAS files. Full steps, including screenshots, are in [Viewing Existing OAS Files](/open-api/createOAS#viewing-existing-oas-files).
1. Open **Preferences → Features** and enable **API Spec**.
2. An **API Spec** section appears in the Bruno sidebar.
3. Click **+** in that section, choose **Open API Spec**, and pick a `.yaml` or `.json` file from disk.
4. The spec appears in the sidebar. Click it to open the viewer.
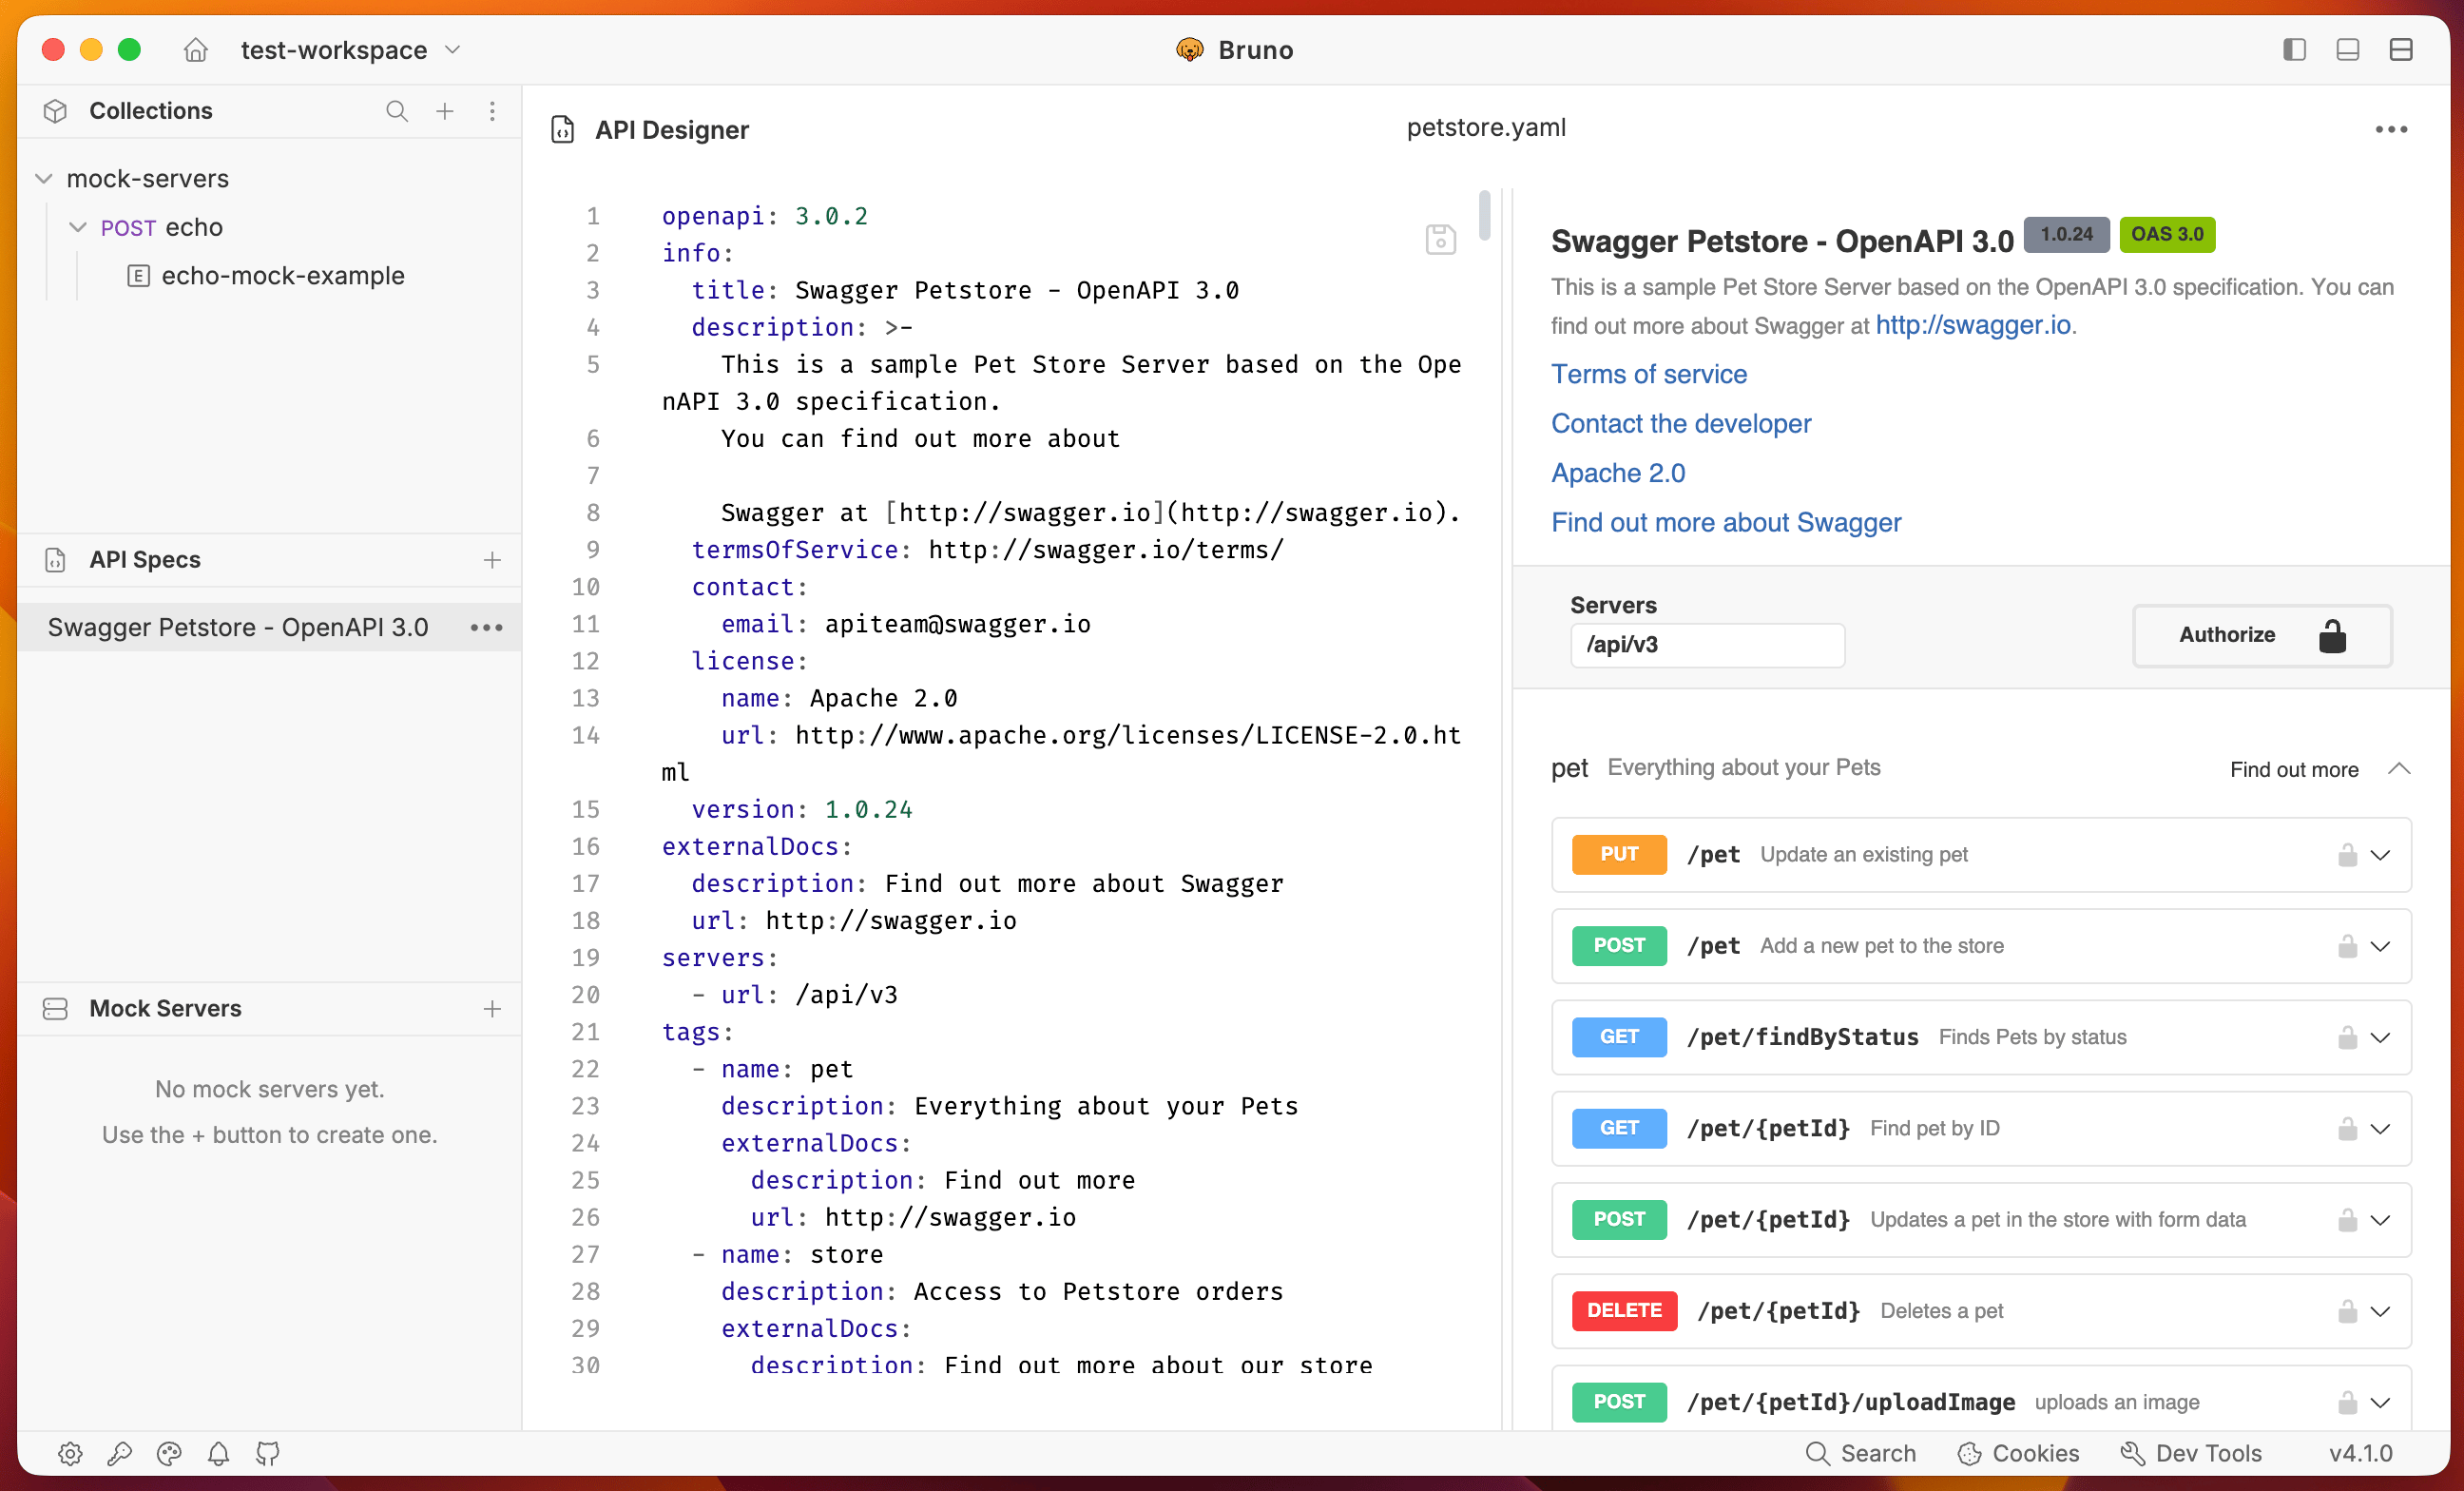 Keep the spec in the workspace so the mock can stay linked to it.
## 2. Create a Mock Server from the spec
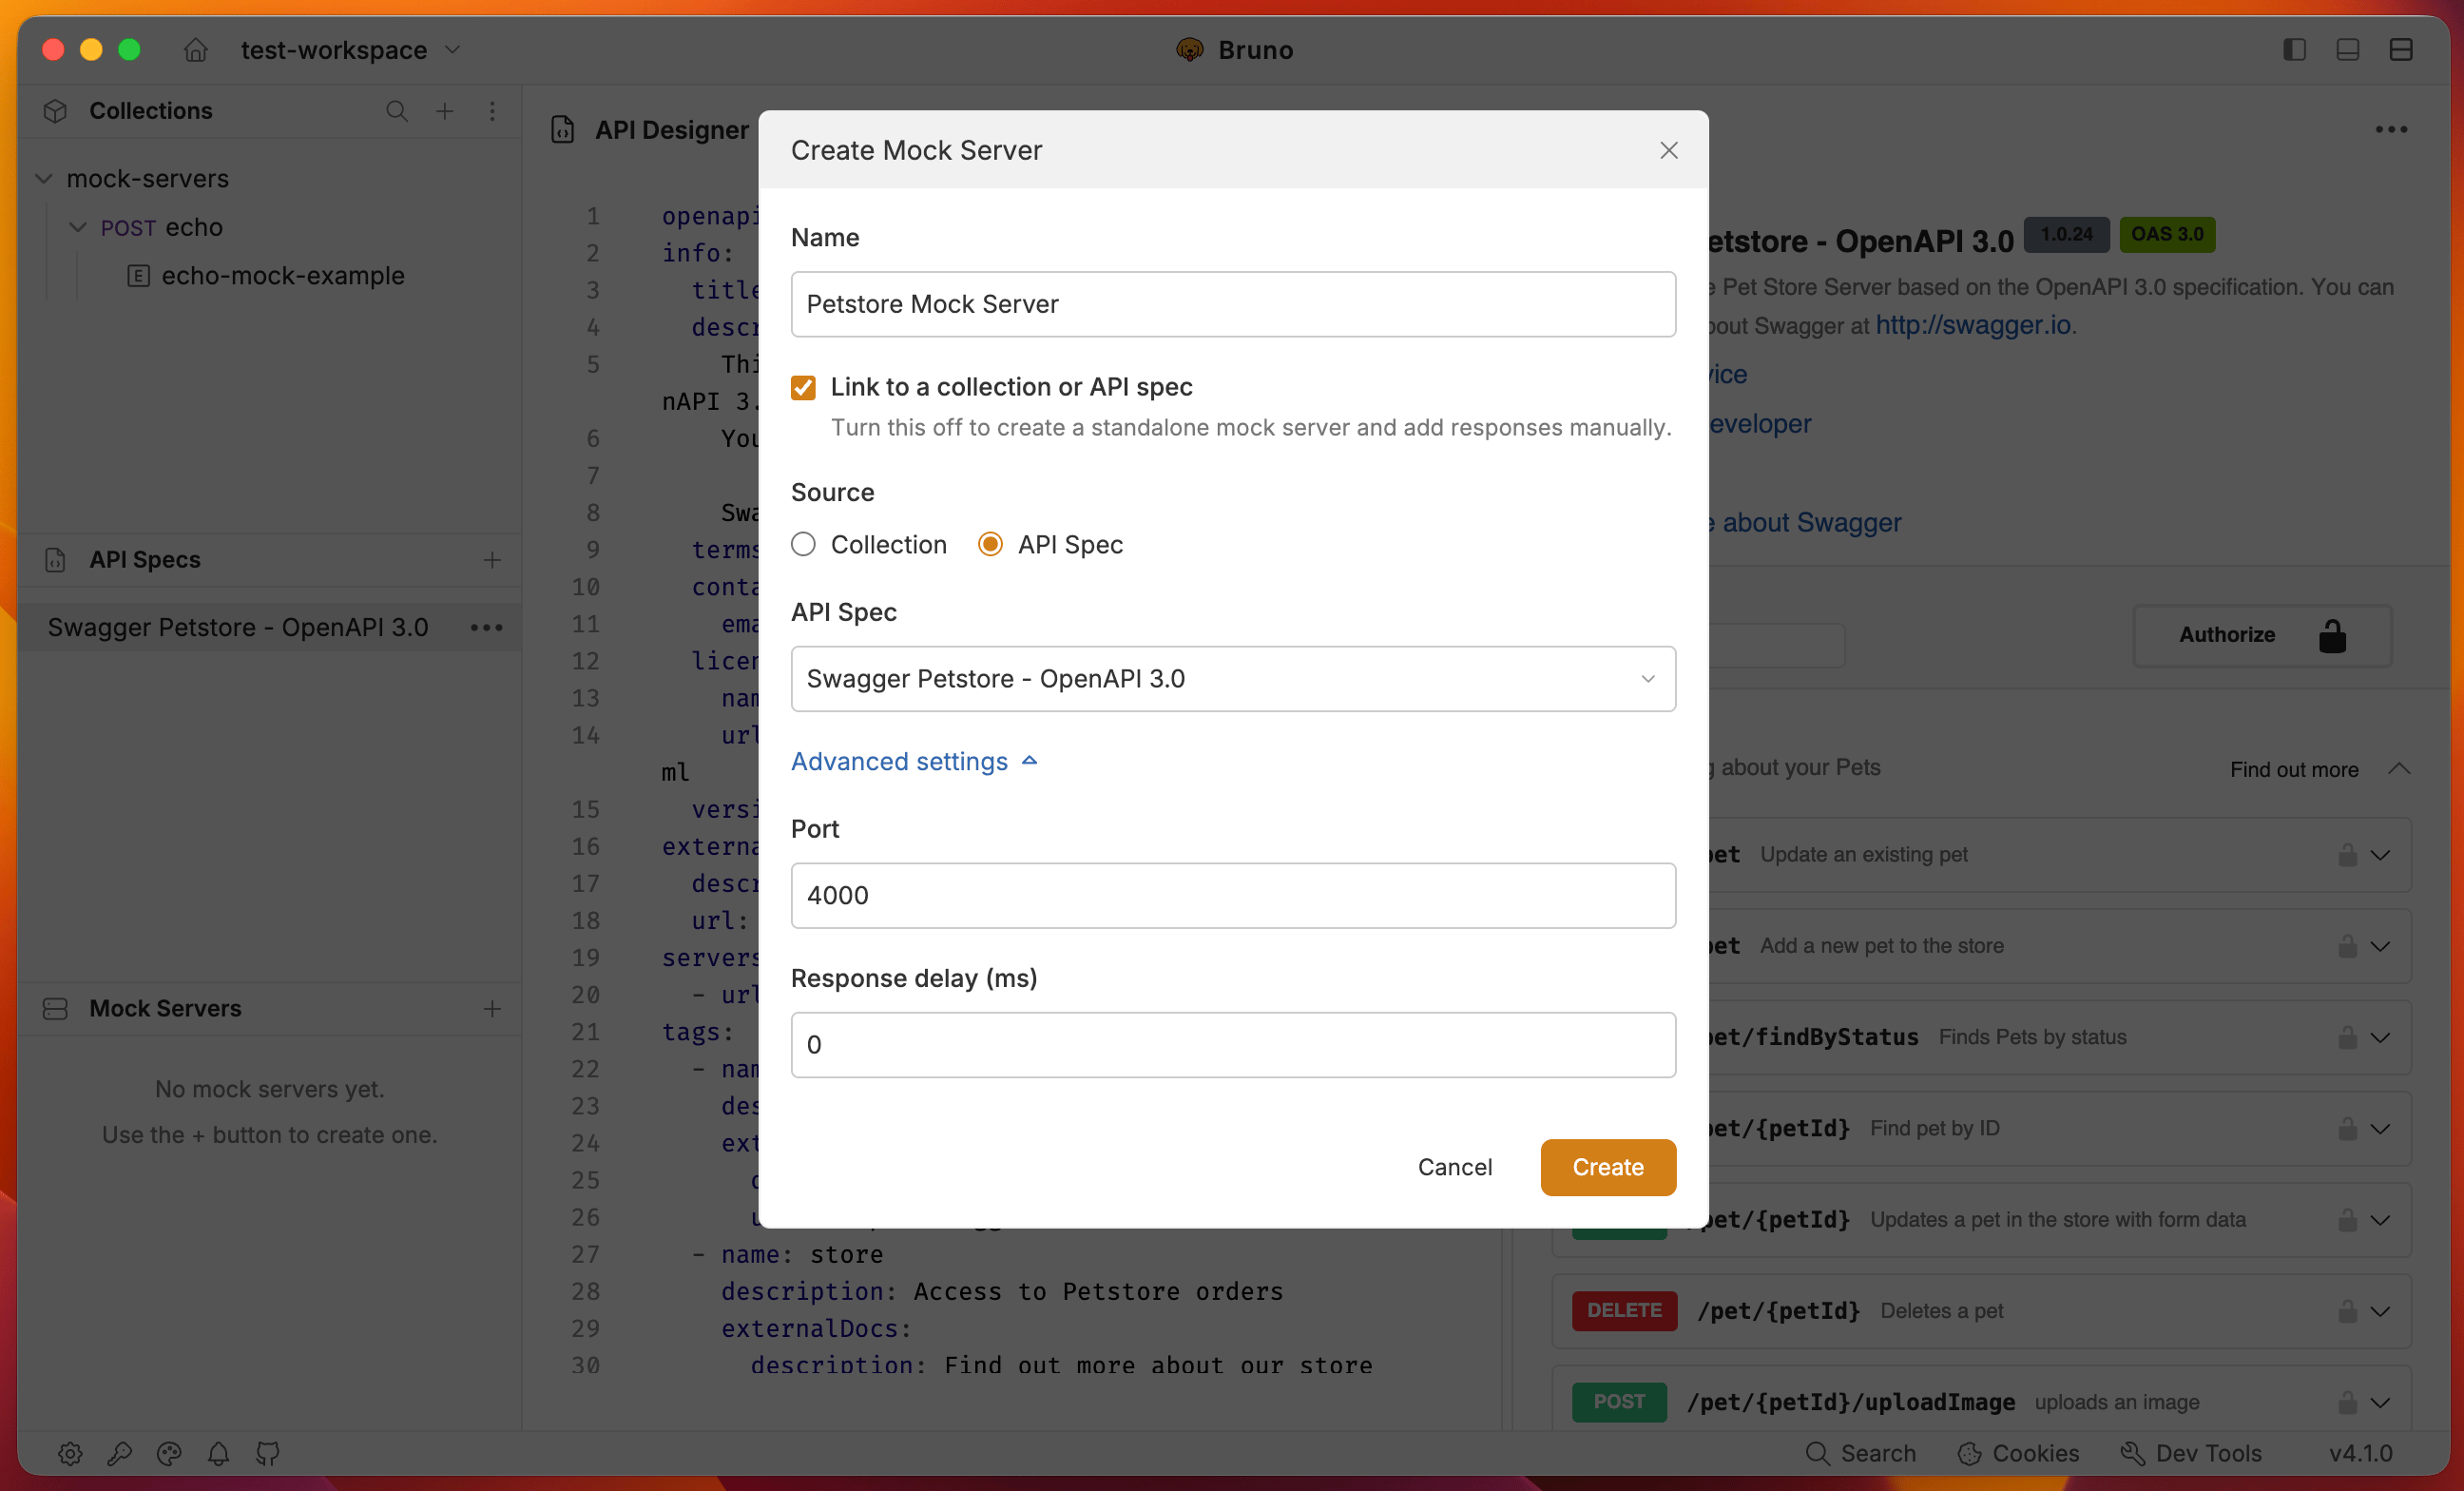
1. Enable Mock Servers under **Preferences → Beta** if they are not already on.
2. Click the **+** icon next to **Mock Servers** in the sidebar.
3. Enter a **name**. Set the source to **API Spec** and select the spec you want to generate from.
4. Optionally open **Advanced settings** to set the **port** and **response delay (ms)**.
5. Click **Create**.
Keep the spec in the workspace so the mock can stay linked to it.
## 2. Create a Mock Server from the spec
1. Enable Mock Servers under **Preferences → Beta** if they are not already on.
2. Click the **+** icon next to **Mock Servers** in the sidebar.
3. Enter a **name**. Set the source to **API Spec** and select the spec you want to generate from.
4. Optionally open **Advanced settings** to set the **port** and **response delay (ms)**.
5. Click **Create**.
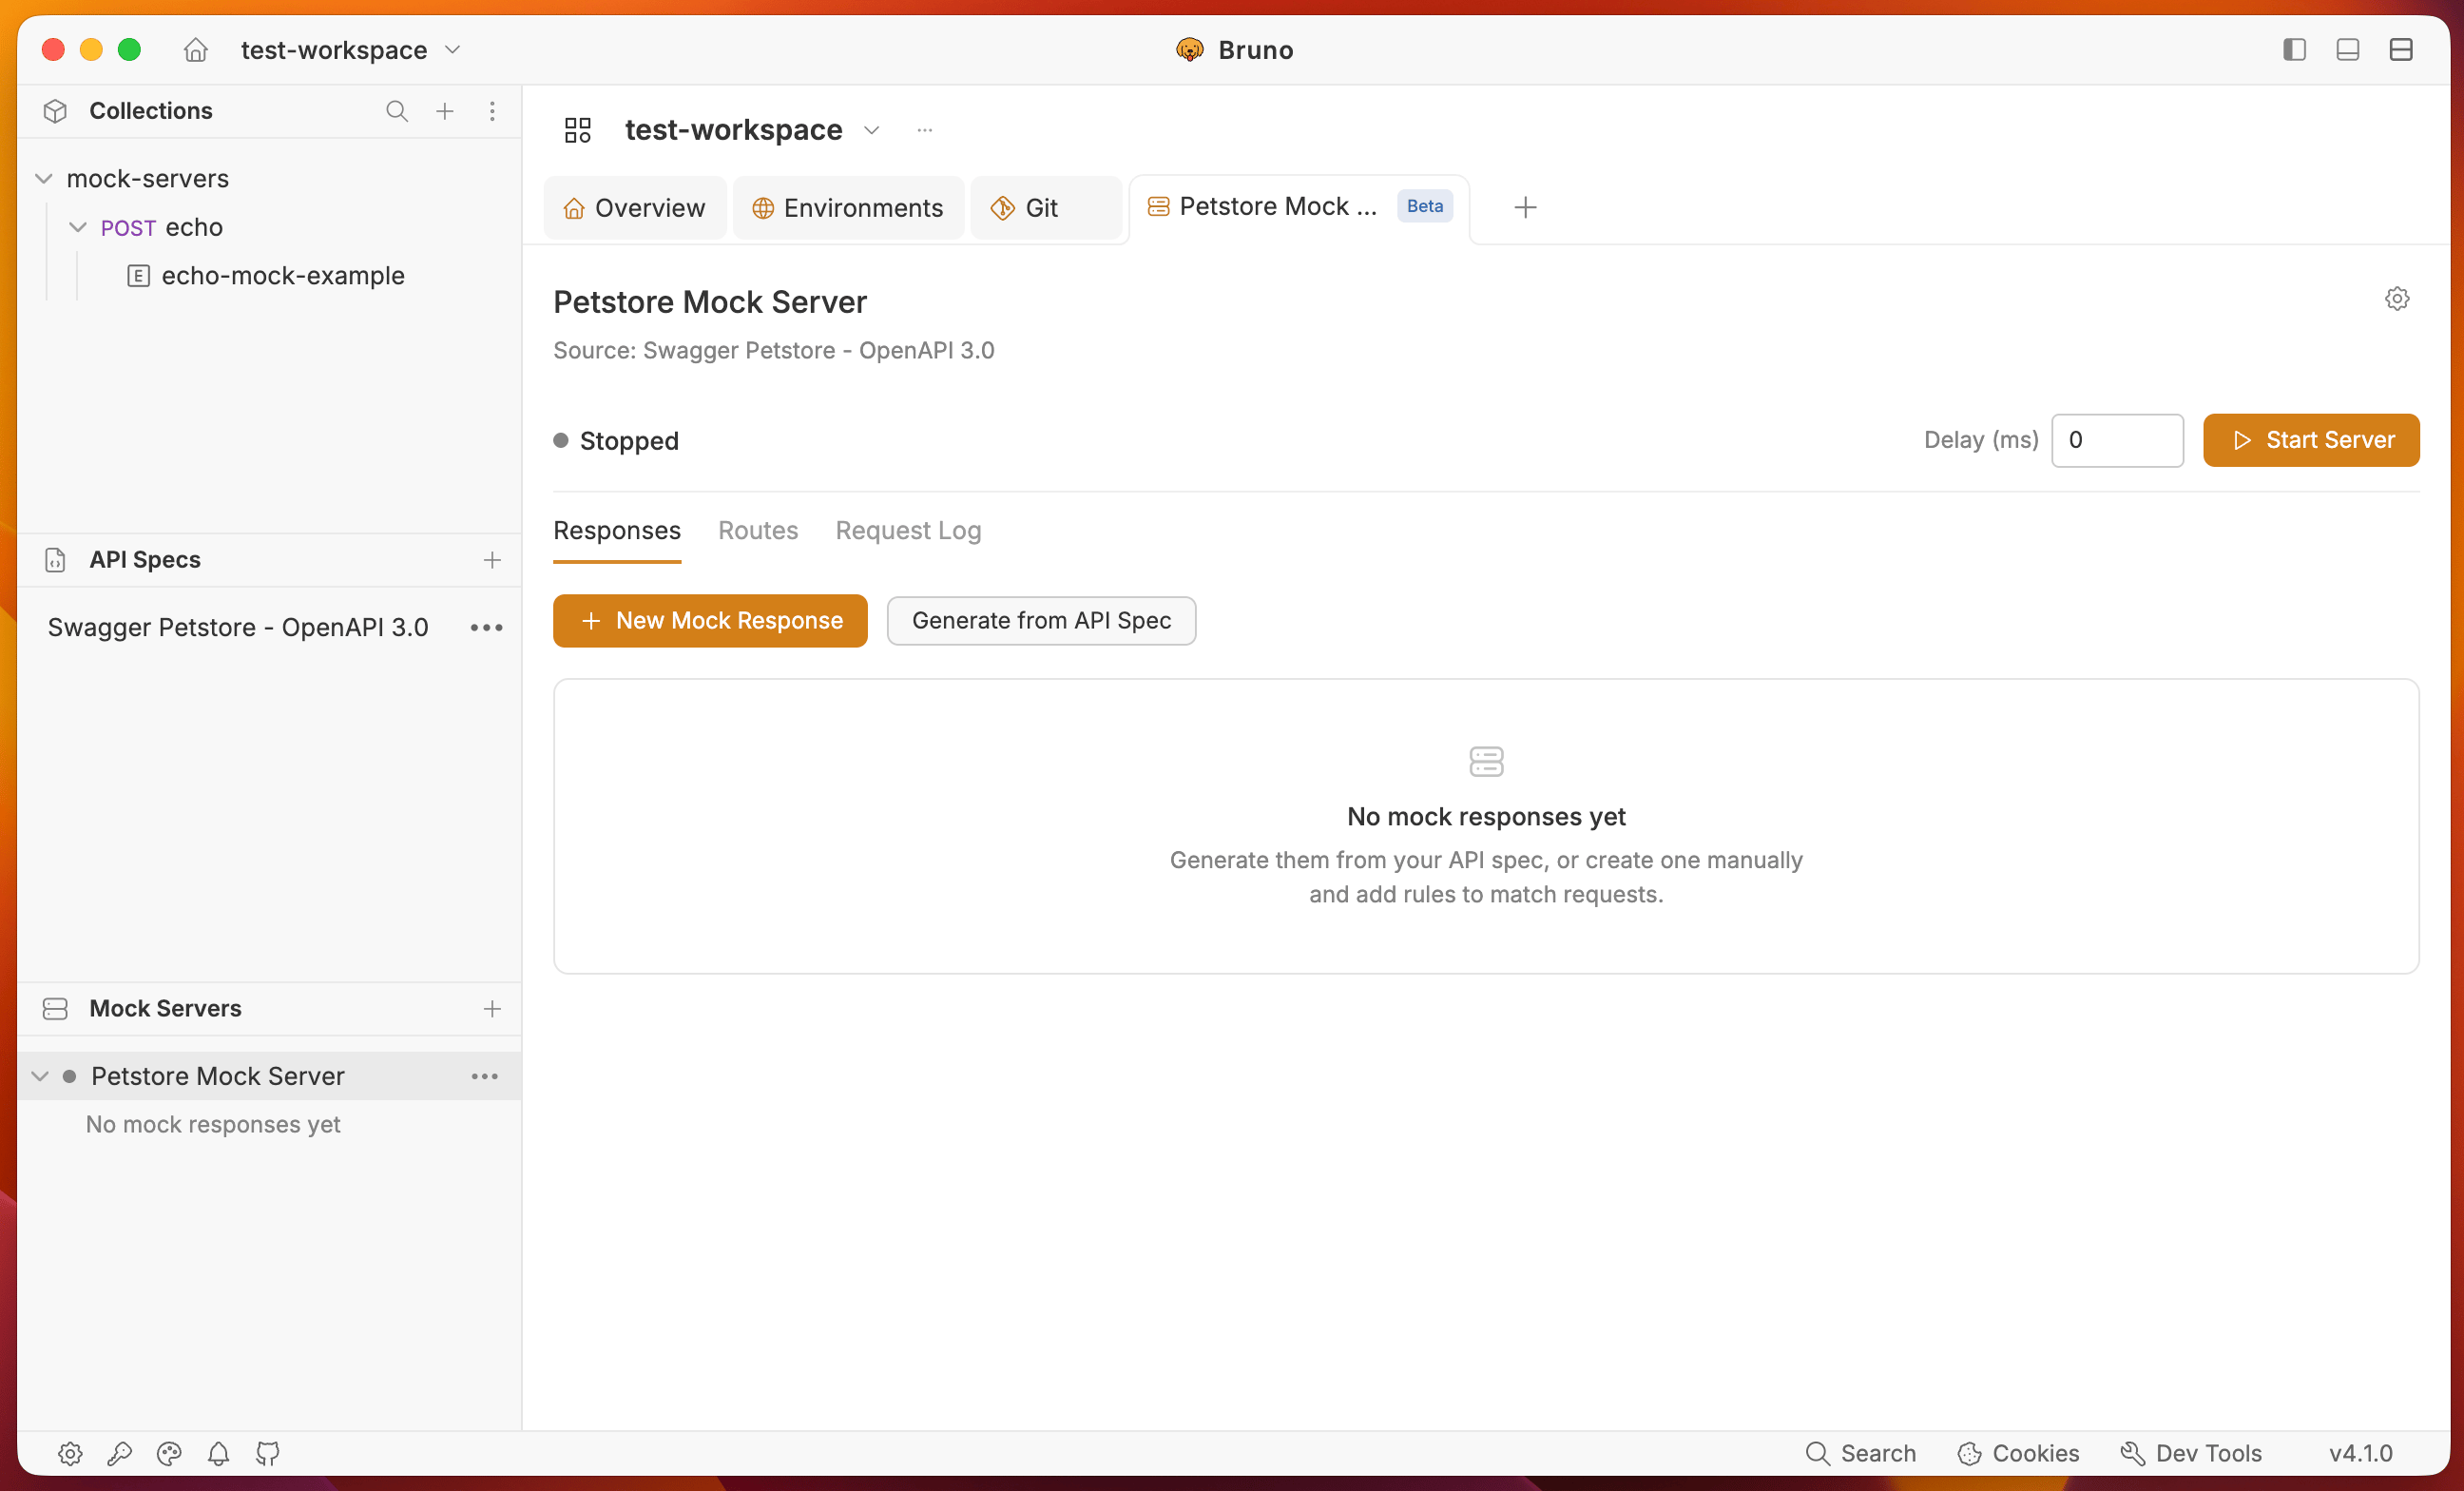
 Bruno opens the mock [dashboard](/mock-servers/run-mock-server#dashboard-interface-walkthrough). Responses are not generated until you run **Generate from API Spec**.
 ## 3. Generate from API Spec
On the **Responses** tab you get two entry points:
* **New Mock Response** - a blank mock you fill in yourself.
* **Generate from API Spec** - one mock response per operation and status in the spec. Bodies come from examples in the spec when present, otherwise from the schema where Bruno can derive them.
Click **Generate from API Spec**. Generated items appear on the **Responses** tab. Search to jump to a path or operation name.
## 3. Generate from API Spec
On the **Responses** tab you get two entry points:
* **New Mock Response** - a blank mock you fill in yourself.
* **Generate from API Spec** - one mock response per operation and status in the spec. Bodies come from examples in the spec when present, otherwise from the schema where Bruno can derive them.
Click **Generate from API Spec**. Generated items appear on the **Responses** tab. Search to jump to a path or operation name.
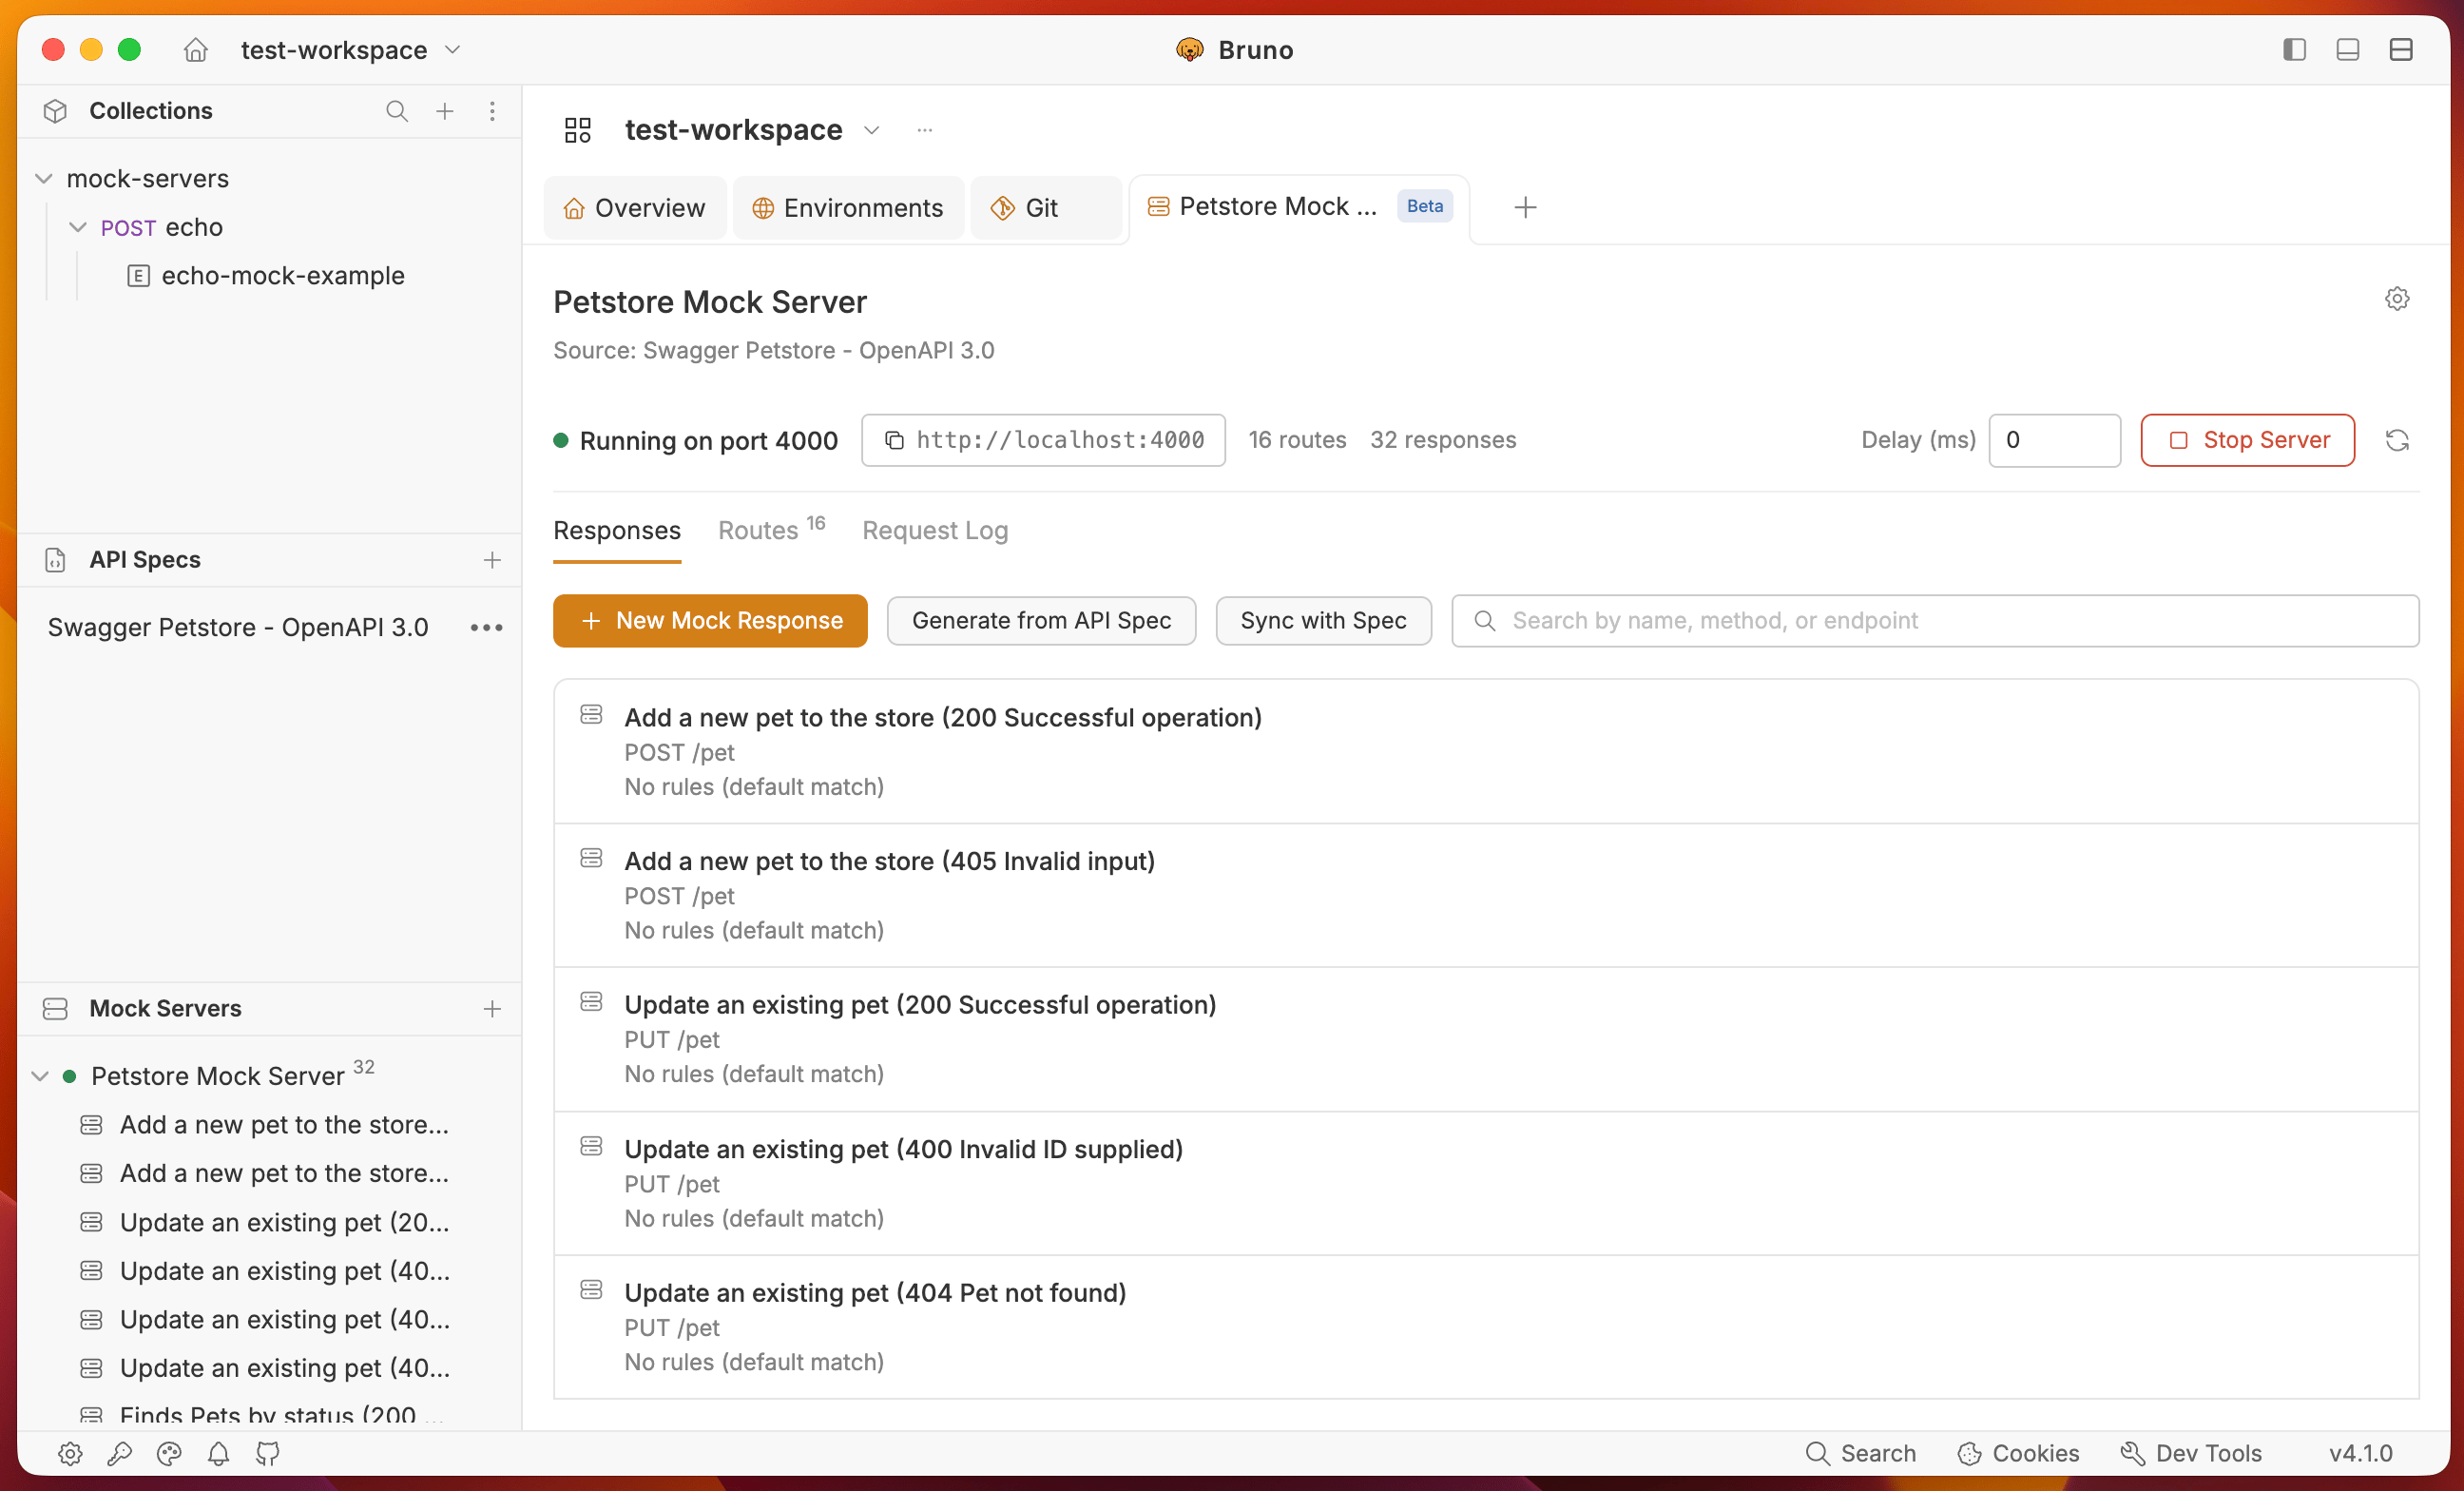 Specs that define several status codes for one operation (for example `200` and `400`) produce several mock responses on the same route. Add [rules](/mock-servers/run-mock-server#rules) if you want the mock to pick among them instead of always returning the default.
## 4. Sync with Spec
If the OpenAPI file changes, use **Sync with Spec**. Bruno re-imports the spec and updates responses that still match an operation (method and path). Custom responses you added or changed stay in place.
Use this after you add endpoints, rename paths, or update example payloads in the spec.
## 5. Start the server
**Start the server** from the dashboard header. Bruno starts with port **4000** and increments to find a new available port for each new mock server. You can also change it in the **Advanced settings** upon creation or via the gear icon. After the server is running, each mock API is available at `http://localhost:4000` or its chosen port.
## 6. Response Editor
Each mock response opens in an editor with two side-by-side sections:
* Left pane: rules, demo request, response URL, **Try** button, and **Open as New Request** button (when to return this response)
* Right pane: expected body, headers, and try results (what the response should look like)
Specs that define several status codes for one operation (for example `200` and `400`) produce several mock responses on the same route. Add [rules](/mock-servers/run-mock-server#rules) if you want the mock to pick among them instead of always returning the default.
## 4. Sync with Spec
If the OpenAPI file changes, use **Sync with Spec**. Bruno re-imports the spec and updates responses that still match an operation (method and path). Custom responses you added or changed stay in place.
Use this after you add endpoints, rename paths, or update example payloads in the spec.
## 5. Start the server
**Start the server** from the dashboard header. Bruno starts with port **4000** and increments to find a new available port for each new mock server. You can also change it in the **Advanced settings** upon creation or via the gear icon. After the server is running, each mock API is available at `http://localhost:4000` or its chosen port.
## 6. Response Editor
Each mock response opens in an editor with two side-by-side sections:
* Left pane: rules, demo request, response URL, **Try** button, and **Open as New Request** button (when to return this response)
* Right pane: expected body, headers, and try results (what the response should look like)
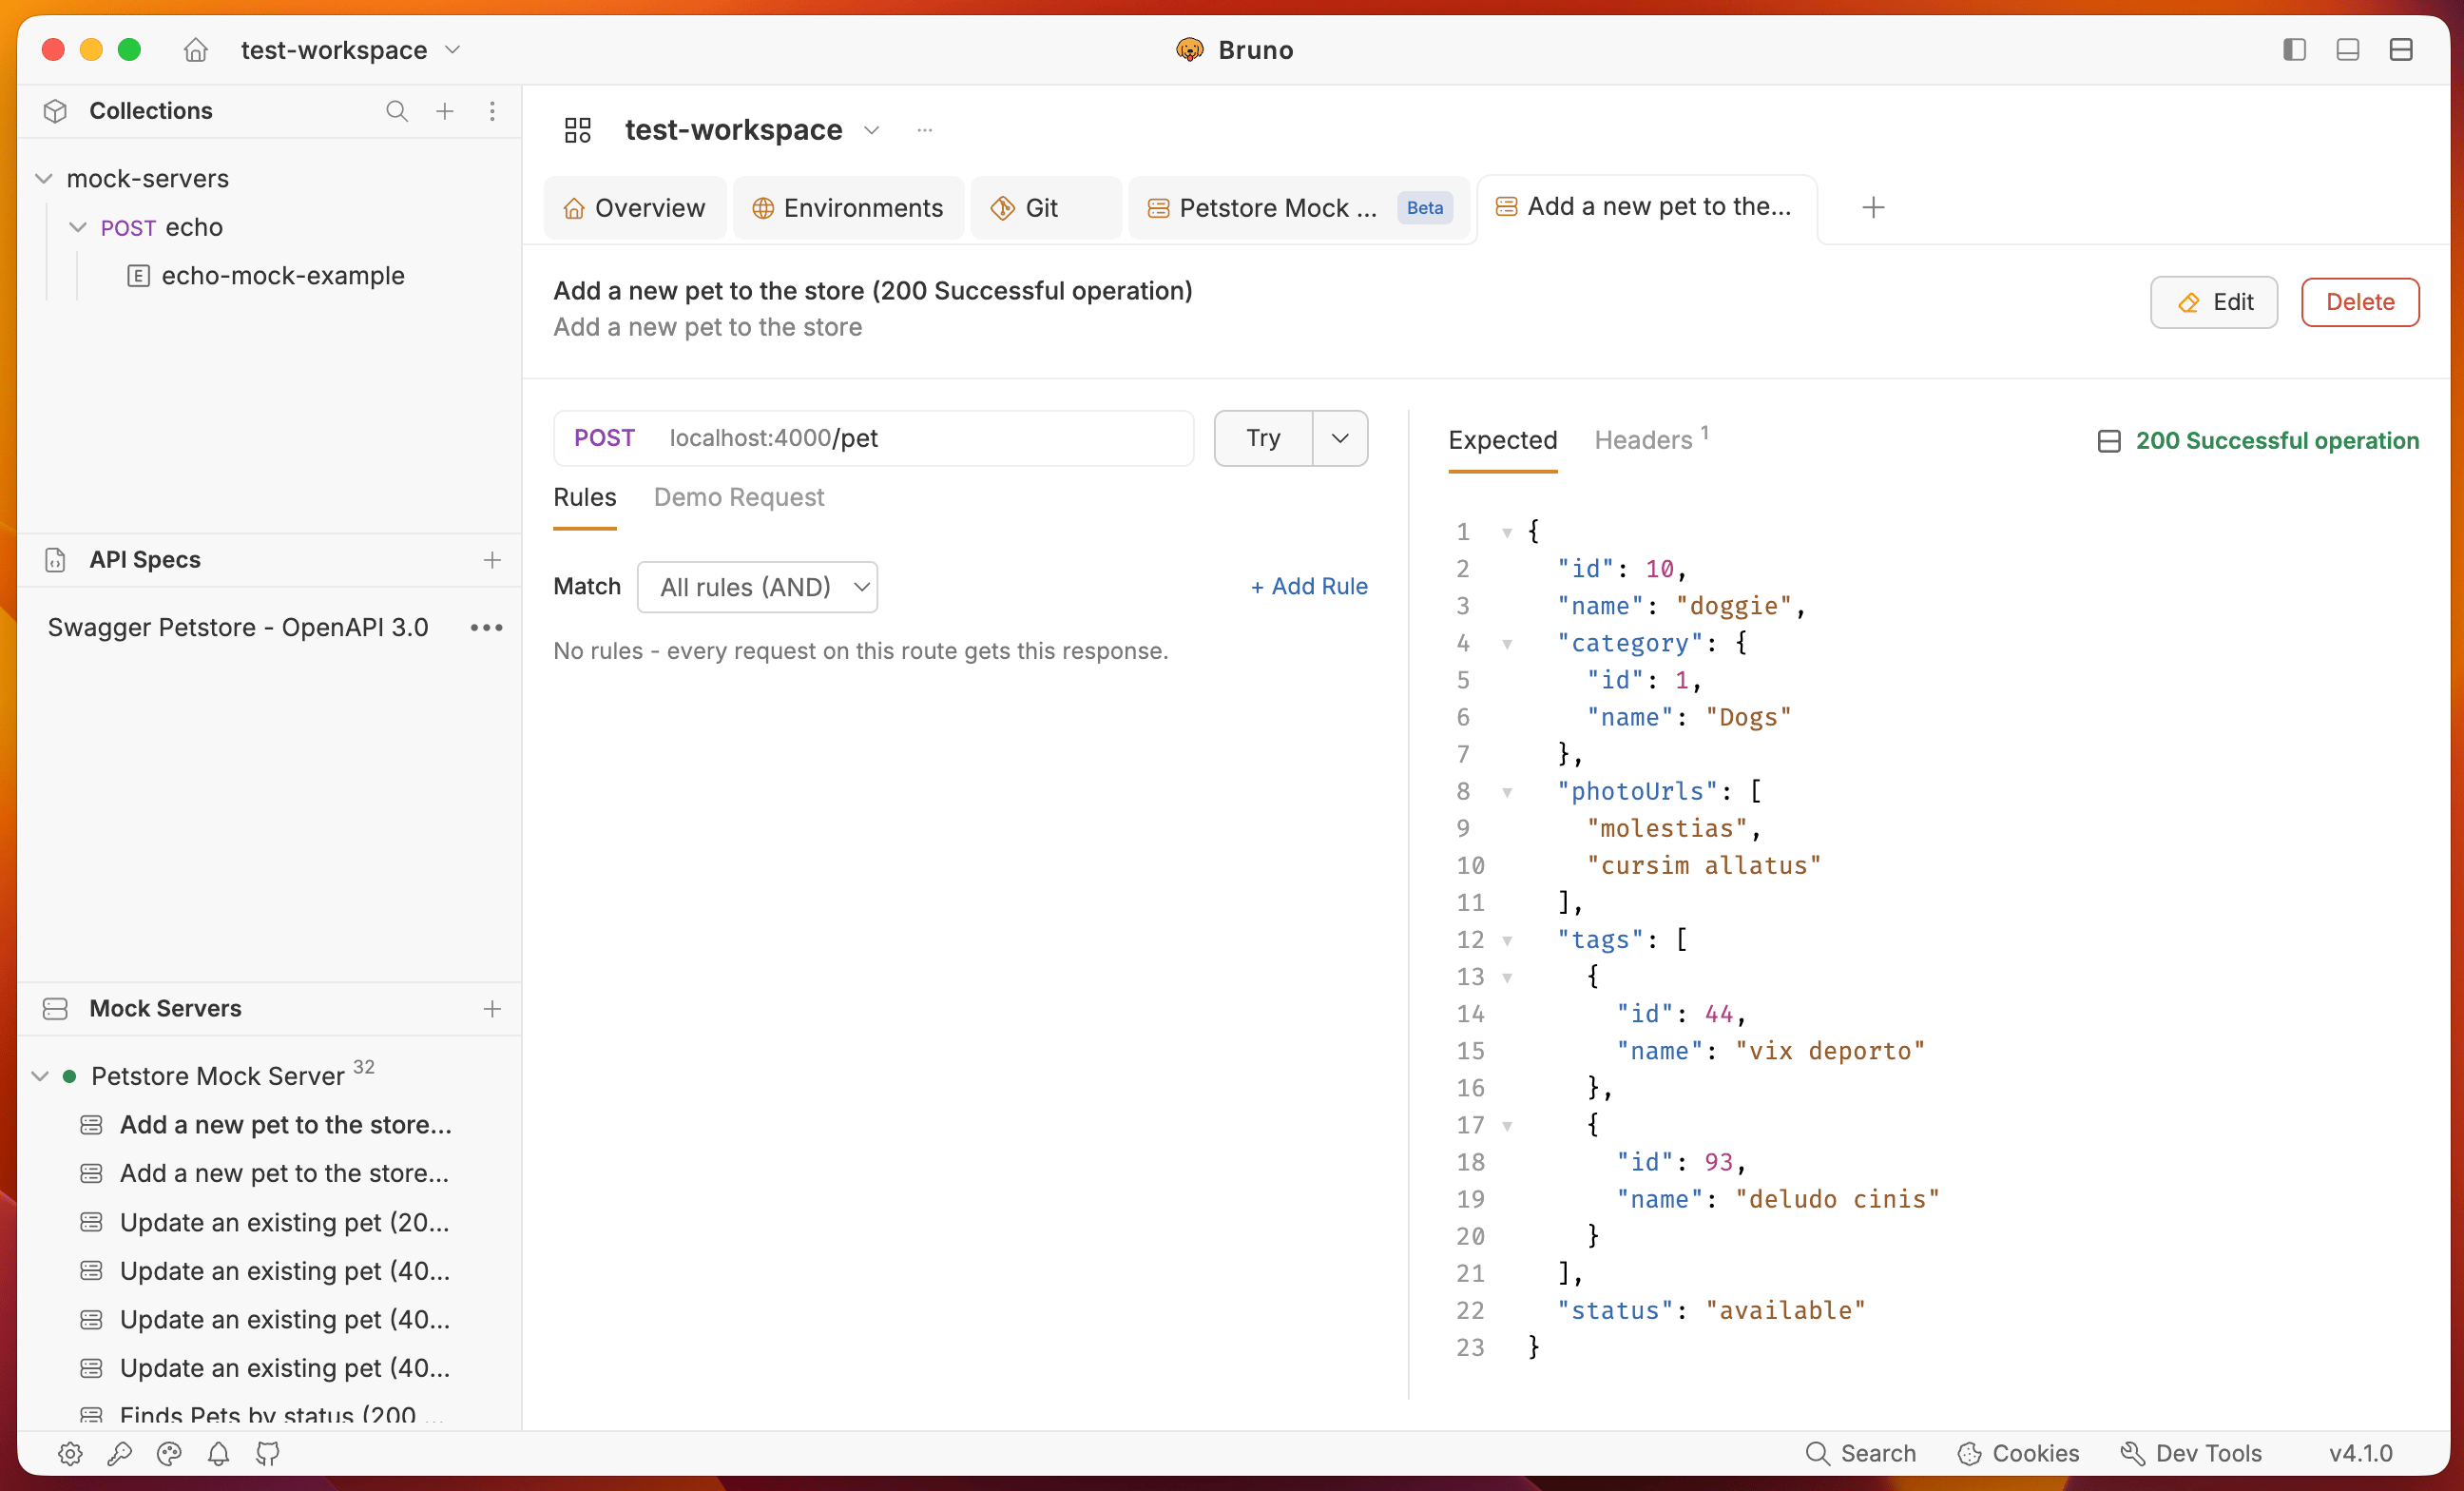 Generated spec responses use the same editor as any other mock. If one operation has several statuses (`200` and `400`, for example), open each response and add rules so the mock can choose among them.
### Rules and demo request
Use this side to decide **when** this response is returned.
#### Rules
To add matching logic, click **Add rule** or the **Edit** icon (top-right of the response). The **Rules** and **Demo Request** tabs appear. See [Rules](/mock-servers/run-mock-server#rules) on the dashboard guide for field-level detail.
You can match on **body**, **headers**, and **query** parameters so the same path can return different payloads (admin vs guest, missing field vs valid body, and so on).
**Match** controls how those conditions combine:
| Match | Behavior |
| --------------------------- | -------------------------------- |
| **All rules AND** (default) | Every condition must pass. |
| **Any rule (OR)** | One passing condition is enough. |
After you add or change rules, click **Save** in the top-right of the editor. Rules are not applied until you save.
Generated spec responses use the same editor as any other mock. If one operation has several statuses (`200` and `400`, for example), open each response and add rules so the mock can choose among them.
### Rules and demo request
Use this side to decide **when** this response is returned.
#### Rules
To add matching logic, click **Add rule** or the **Edit** icon (top-right of the response). The **Rules** and **Demo Request** tabs appear. See [Rules](/mock-servers/run-mock-server#rules) on the dashboard guide for field-level detail.
You can match on **body**, **headers**, and **query** parameters so the same path can return different payloads (admin vs guest, missing field vs valid body, and so on).
**Match** controls how those conditions combine:
| Match | Behavior |
| --------------------------- | -------------------------------- |
| **All rules AND** (default) | Every condition must pass. |
| **Any rule (OR)** | One passing condition is enough. |
After you add or change rules, click **Save** in the top-right of the editor. Rules are not applied until you save.
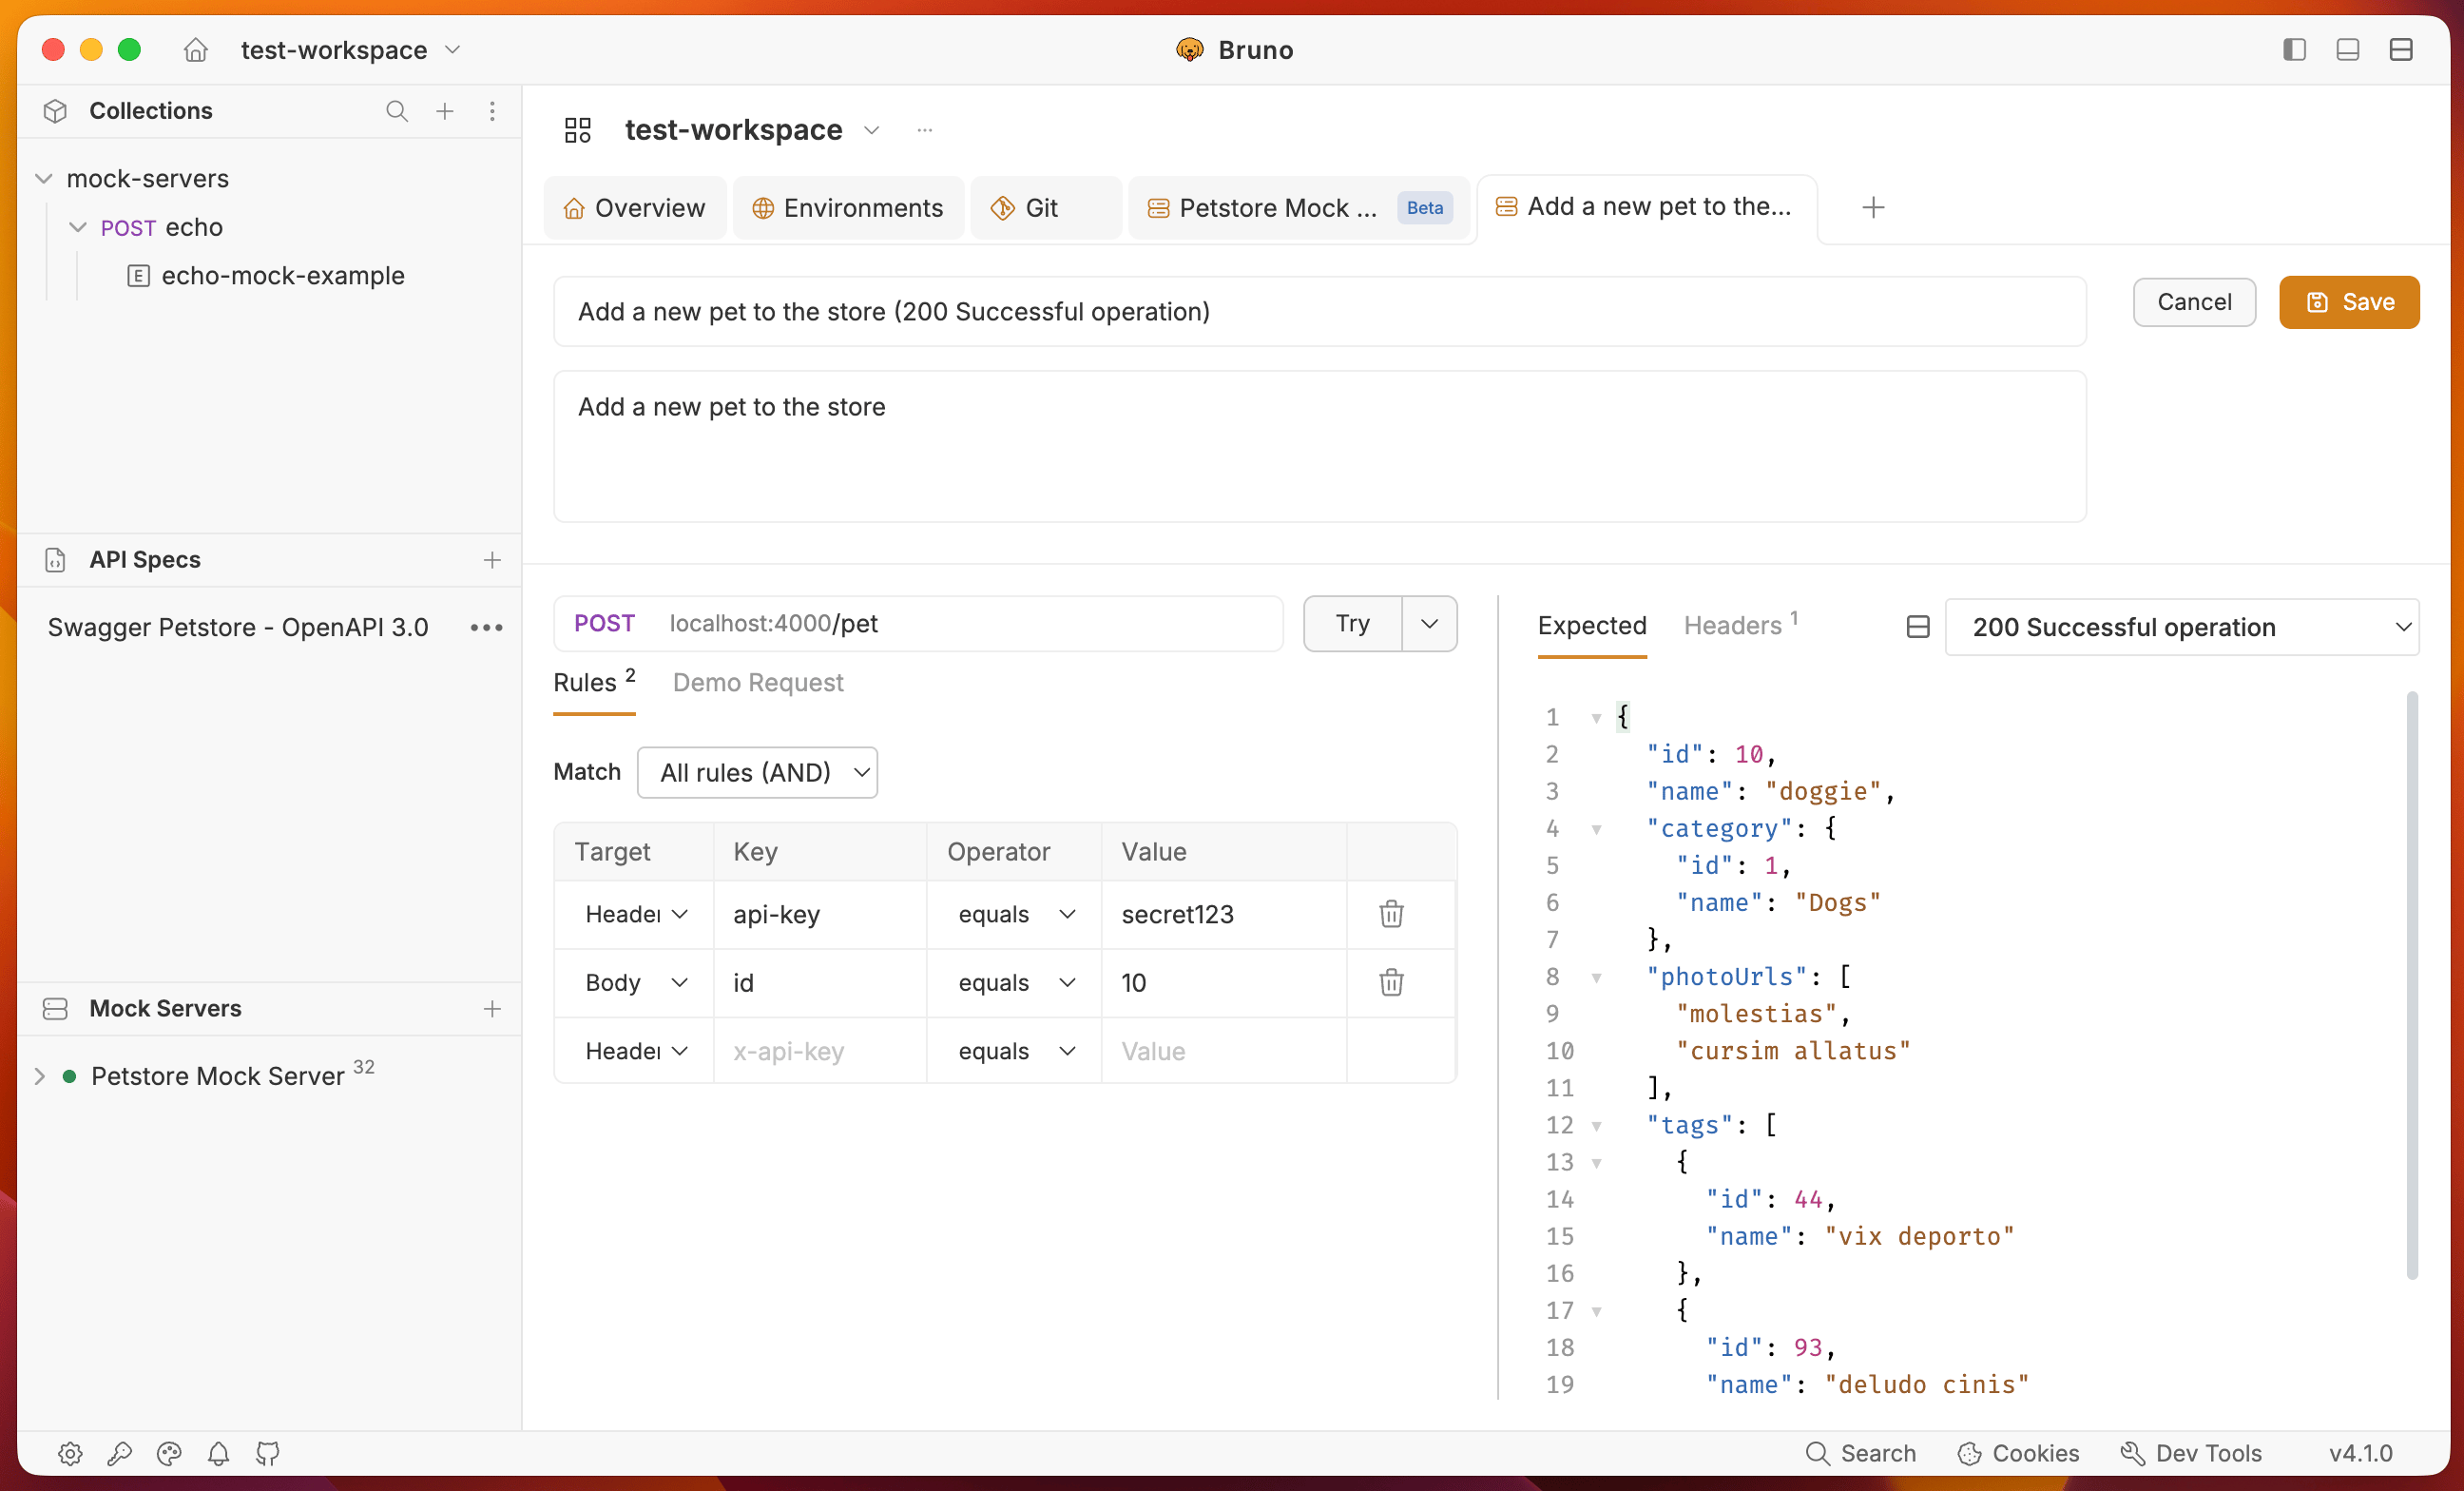 With the mock server running, click **Try** next to the response URL to send the demo request. Open the **Try Result** tab on the right to see the body and headers the mock returned.
**Demo Request** is generated from the rules you defined. It shows a sample request that would select this response.
**Open as New Request** opens the demo request in a new request tab with the rules and demo request applied.
### Expected body and headers
Use this side to see **what** the mock returns: the **Expected** body and **Headers**, plus the status code.
The body can be JSON, HTML, text, or XML. Headers are independent of body type — set `Content-Type` and any other headers the client should see.
**Try Result** shows the response body and headers from **Expected** and **Headers** after you click **Try** (with the server running).
## 7. Inspect traffic
After the server is running:
* **[Routes](/mock-servers/run-mock-server#routes-tab)** - registered method and path combinations from the spec (and any extra responses you added), plus hit counts.
* **[Request Log](/mock-servers/run-mock-server#request-log-tab)** - each incoming request, the selected mock (or **No Match**), and the Match Trace Inspector when a rule did not behave as expected.
See the [dashboard walkthrough](/mock-servers/run-mock-server#dashboard-interface-walkthrough) for delay, refresh, copy URL, and filters.
## Next steps
* [Mock Servers from Collection](./mock-from-response-examples) - same dashboard, sourced from collection examples instead of a spec.
* [Create a mock server](/mock-servers/create-mock-server) - collection, spec, and standalone sources.
* [Run a mock server](/mock-servers/run-mock-server) - dashboard, rules, routes, and request log.
With the mock server running, click **Try** next to the response URL to send the demo request. Open the **Try Result** tab on the right to see the body and headers the mock returned.
**Demo Request** is generated from the rules you defined. It shows a sample request that would select this response.
**Open as New Request** opens the demo request in a new request tab with the rules and demo request applied.
### Expected body and headers
Use this side to see **what** the mock returns: the **Expected** body and **Headers**, plus the status code.
The body can be JSON, HTML, text, or XML. Headers are independent of body type — set `Content-Type` and any other headers the client should see.
**Try Result** shows the response body and headers from **Expected** and **Headers** after you click **Try** (with the server running).
## 7. Inspect traffic
After the server is running:
* **[Routes](/mock-servers/run-mock-server#routes-tab)** - registered method and path combinations from the spec (and any extra responses you added), plus hit counts.
* **[Request Log](/mock-servers/run-mock-server#request-log-tab)** - each incoming request, the selected mock (or **No Match**), and the Match Trace Inspector when a rule did not behave as expected.
See the [dashboard walkthrough](/mock-servers/run-mock-server#dashboard-interface-walkthrough) for delay, refresh, copy URL, and filters.
## Next steps
* [Mock Servers from Collection](./mock-from-response-examples) - same dashboard, sourced from collection examples instead of a spec.
* [Create a mock server](/mock-servers/create-mock-server) - collection, spec, and standalone sources.
* [Run a mock server](/mock-servers/run-mock-server) - dashboard, rules, routes, and request log.